When you click on the Configure button, the Configuration Manager will appear. Click the Configure button again to hide it - there's no separate close button, it toggles just like the Galaxy, EDSM, and Bookmarks buttons.
It has a number of tabs:
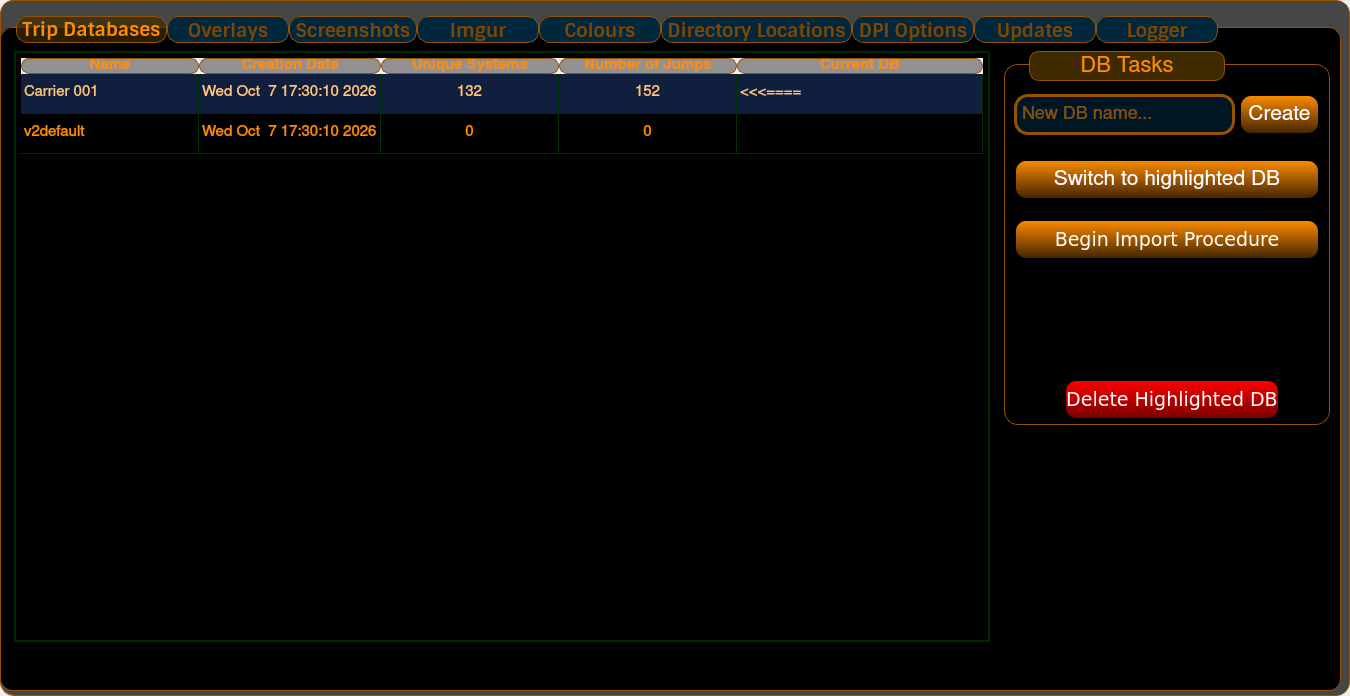
Trip Databases : Lists all your created Trip databases and performs a number of operations on those databases.
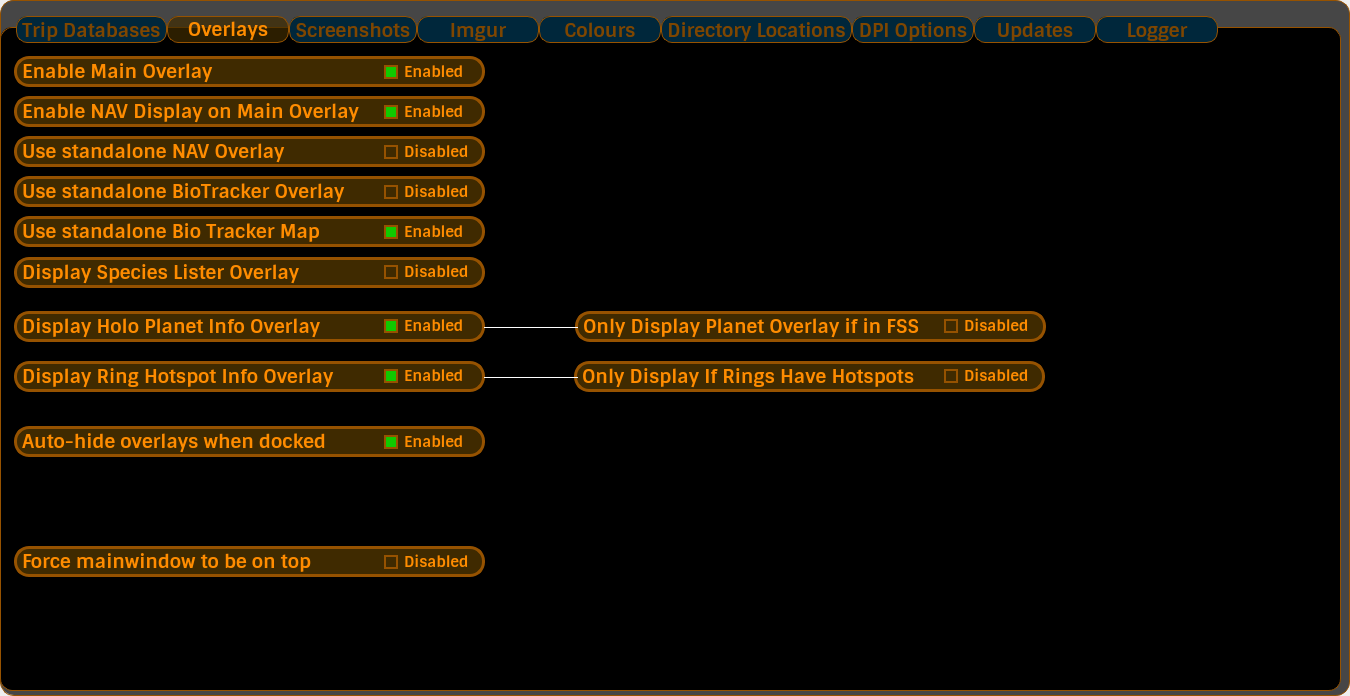
Overlays : Turn the various overlays on and off, and choose whether some of them run standalone.
Screenshots : To configure the Screenshot Detector/Converter/Renamer feature and to activate or deactivate it.
Imgur : To configure uploads to Imgur, whether as an Anonymous user or as your Imgur user, to activate or deactivate the feature.
Colours : to customise the Captain's Log colour scheme.
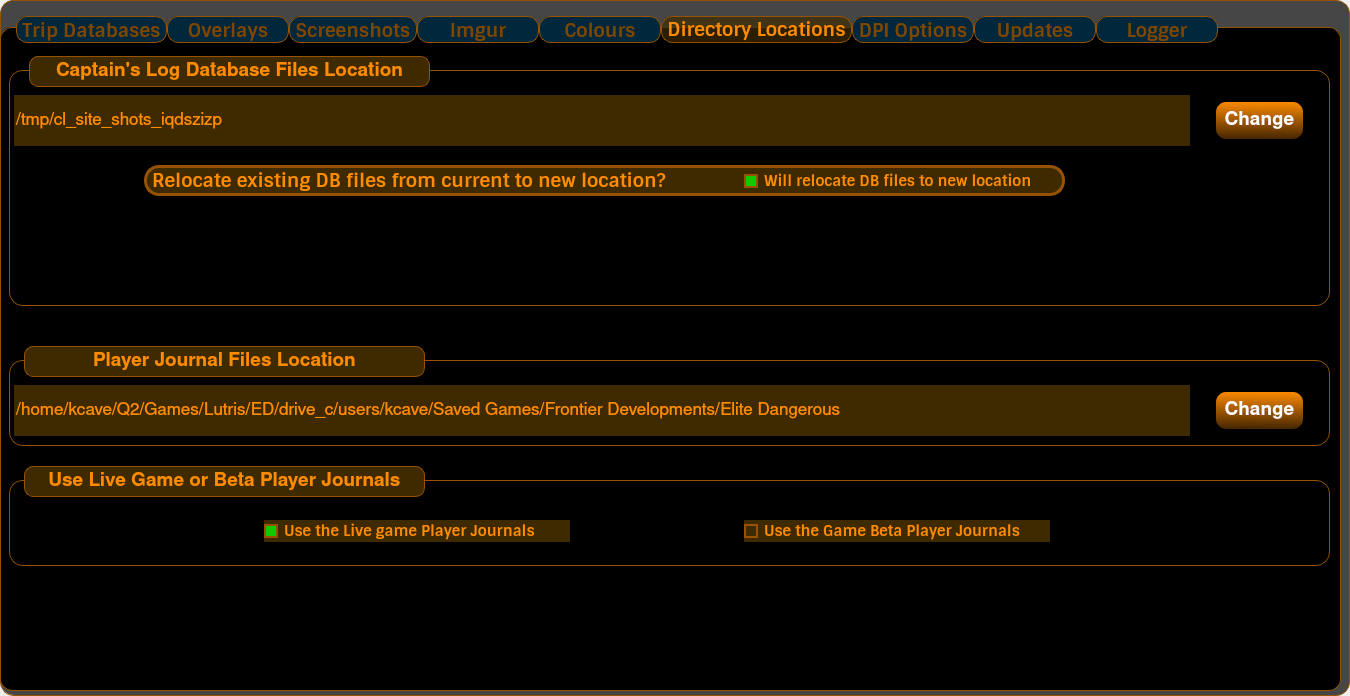
Directory Locations : to configure where to store Captain's Log's trip databases and also to configure the location of where the game stores its Player Journal files.
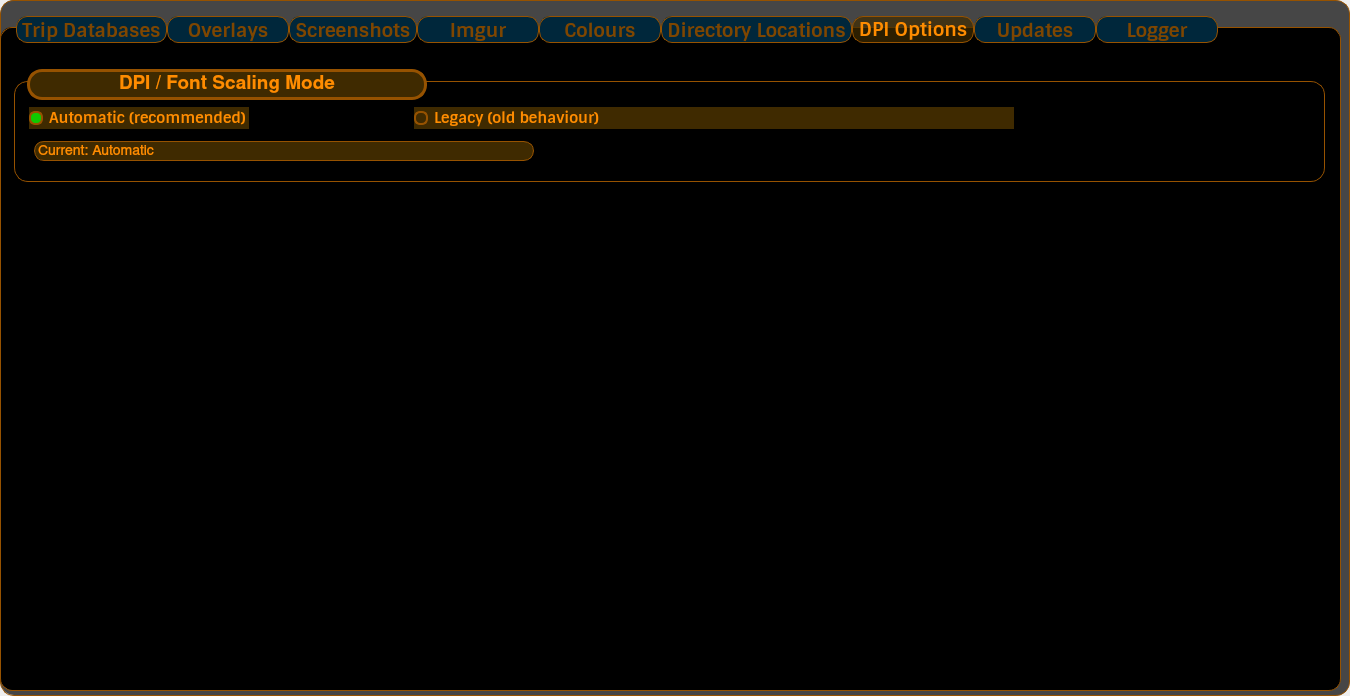
DPI Options : to choose how Captain's Log handles High DPI displays.
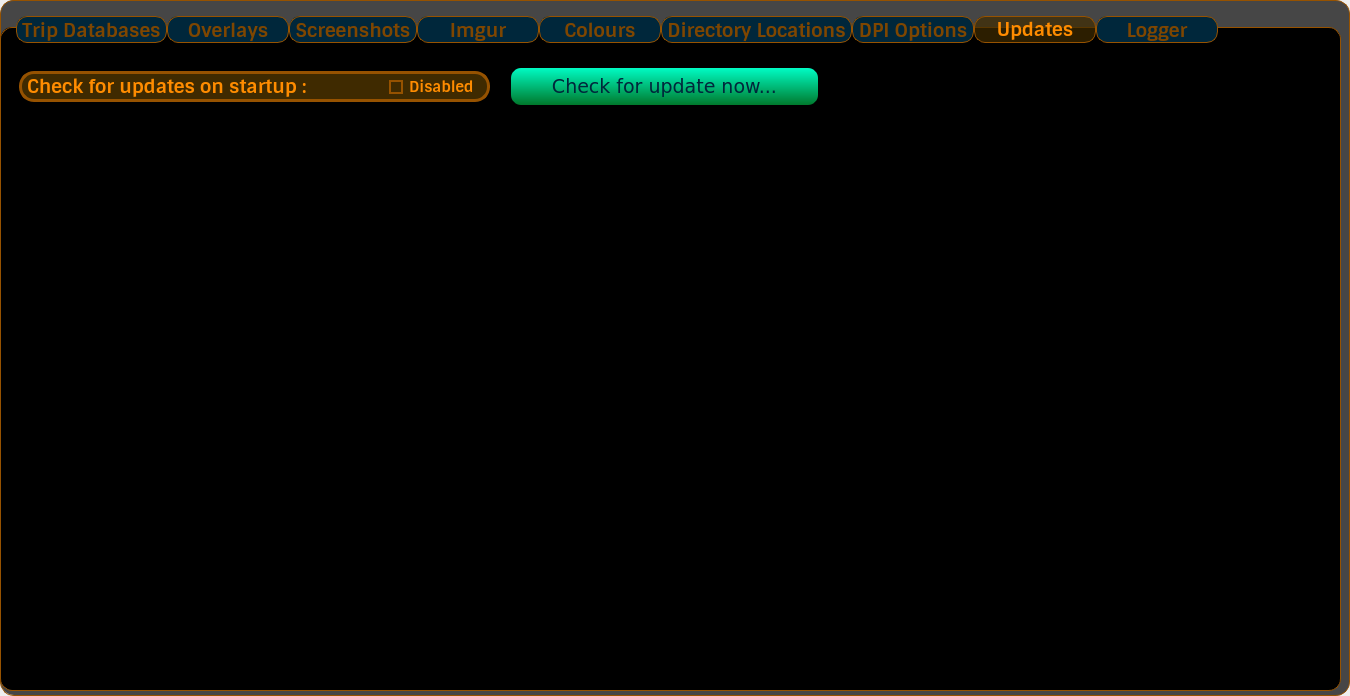
Updates : to configure whether or not Captain's Log checks for updates.
Logger : At various times throughout the operation of Captain's Log, various internal functions will log messages to the Logger window.
Select your desired configuration area by clicking on the relevant tab.
Screenshots, Imgur, and Colours each have their own pages - see the links in the manual index. The rest are covered below.
Trip Databases
On the left is the list of all the trip databases created. If this is the first time CL2 has been run, there will only be the one, v2default trip database. If you do not create any more databases, all jumps will be recorded to this one.
To the right is the DB Tasks area.
Here, you can create a new trip database. Simply type in the name of your new database, and either press Enter, or click Create. You cannot create a new database with the same name as the existing one.
Switch to highlighted DB : If you want to switch to a different database, highlight the name of the database you wish to switch to by clicking the relevant name, and click on the button. CL2 will then load that database, and any jumps recorded in it.
Scan all logs and import to DB : This will attempt to scan any and all Player Journal logs generated by the game, and import any jumps, scans of planets and stars, rings, and materials resulting from scanning landable planets, into the CL2 database. Stars, Systems, Planets, Rings, and Materials all go into a special central database for use only by CL2, called GALAXY.db. Jumps go into the Trip Database and reference the GALAXY database for system names, planets, stars, body types, rings, materials etc.
Duplicate entries will not be created, so this is a safe operation. Although normally, you would scan and import to a blank trip database.
Delete Highlighted DB : the Big Red Button :) ... does what it says, will remove an existing and highlighted database. It will NOT remove a loaded database.
Overlays
This tab is where you turn the overlays on and off.
Enable Main Overlay : the main overlay that appears over the game when in Overlay mode.
Enable NAV Display on Main Overlay : shows the navigation section on the main overlay.
Use standalone NAV Overlay : puts the navigation display in its own separate window rather than on the main overlay.
Use standalone BioTracker Overlay : runs the BioTracker in its own window.
Use standalone Bio Tracker Map : the graphical Bio Tracker Map (see the Exobiology page).
Display Species Lister Overlay : the overlay that lists species you've scanned and analysed.
Display Holo Planet Info Overlay : the wireframe planet data overlay. The Only Display Planet Overlay if in FSS option restricts it to showing only while the Fuel Scoop System scan is running.
Display Ring Hotspot Info Overlay : the ring hotspots overlay. Only Display If Rings Have Hotspots keeps it out of the way unless the selected body actually has hotspots.
Auto-hide overlays when docked : hides the overlays when you dock at a station, and brings them back when you undock.
Force mainwindow to be on top : when in Overlay mode, keeps the main window above all other windows. Handy on a single monitor. If you run two or more monitors and want other windows to be able to sit on top of the CL main window on the second monitor, turn this off.
Standalone overlay windows remember their position, so they pop back where you left them.
Directory Locations
You can set the directory location of where to store CL2 DB's, and also manually set the location of where the game stores its Player Journal files, if that location is different from the default.
Changing the database locations now has an option for CL2 to relocate all the .db files from the current location to the new location.
This option is a checkbox which is ON by default and will read "Will relocate DB files to new location".
If you wish to NOT have CL2 relocate those files for you, clicking on the checkbox to deactivate the option and will read "Will not relocate DB files".
To change the DB location, click on the button marked Change
A Windows folder selection dialog window will appear. Create and/or select a folder to which you wish CL2 to keep and reference your DB files.
Once you have selected a folder, CL2 will ask if you are sure you wish to go ahead...
CL2 will provide feedback whilst it moves the DB files if you chose the default option to move them...
The EDSMStarData.db file will be rather big and will take a while to transfer to the new DB location.
After this task has been completed, CL2 needs to be restarted. A dialog window will appear... Click on Restart and CL2 will exit and restart, with the new configuration.
DPI Options
Captain's Log tries to handle High DPI displays properly. If things look too small, too big, or blurry, you can change how it's done here.
Automatic (the default, and recommended) : lets Captain's Log scale itself to match your display's DPI.
Legacy : the old way of handling DPI. Worth a try if Automatic doesn't suit your particular monitor setup.
Updates
Here you can turn the "check for updates" behaviour on or off. When an update is found, Captain's Log shows you the URL for the download - clicking it opens the Captain's Log web site in your browser.
Logger
At various times throughout the operation of Captain's Log, various internal functions will log messages to the Logger window. It's mostly for diagnosing the odd problem - if you're asked for a log when reporting an issue on Discord, this is the place.
The same log is also written to a file called CL2_log.txt in your Windows temp folder - see If Things Go Wrong for where to find it.
Your browser is out-of-date!
Update your browser to view this website correctly.