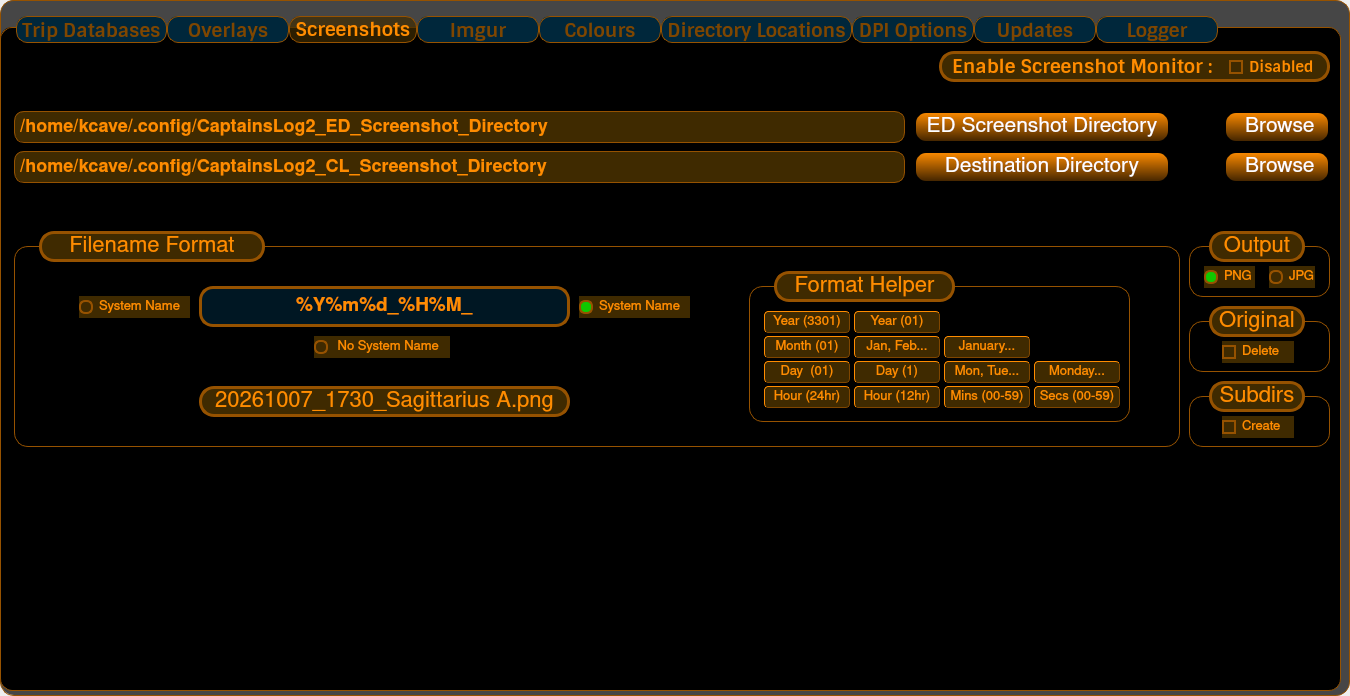
Captain Log's Screenshot Monitor is configured here.
Captain's Log can monitor the directory where the game saves its screenshots to. Screenshots are created by the game via pressing the F10 key in-game. Captain's Log does not take screenshots. The game saves its screenshots as BMP files, which is a picture format which results in a very large file size per picture, and if you take many screenshots, this can very quickly fill up your hard drive. Captain's Log can convert from BMP format to either PNG or JPG format.
Once CL2 has detected that there is a new screenshot created, it reads that BMP image file in, and converts it to either of the two other formats. It then renames them to a format of your choice. A default naming scheme is already configured, which you can alter to your own tastes.
There are two directories to set up - the defaults should suffice.
Note : If you reconfigure this save location, do not specify a location anywhere inside the ED Screenshot directory, as this will cause an infinite loop problem. Only specify a location outside the ED screenshot directory.
Here you can configure the filename you wish Captain's Log to save the converted screenshot as. There is a preview of the name below the format entry box.
To change the format, use the entry box. You can completely remove all the existing format and start from scratch. There is a Format Helper box with pushbuttons you can click to assist you with the format...
The buttons are self explanatory; if you want the Year to be added into the filename, click once on which Year format you'd like. Same for the Month, Day, Hour, Minute, and Seconds.
You can also choose to prepend or append the system name - the system name is taken from the current system your ship is in, in the game. This will either be the last system name loaded into the Trip Jump table, or the last system you have jumped to in the game. You can alternatively choose not to add the system name. This is accomplished by activating one of the three radio buttons surrounding the format entry box.
Simply check or uncheck. There is a corresponding indicator on the main window which you can also click to check or uncheck to enable or disable this feature.
All of these options are saved to a configuration file and will be recalled and set whenever CL2 is loaded.
Update your browser to view this website correctly.